|
Custom Puzzle Craft Kite Restoration Project - Part 4 - Restoration |
Restoring The Dragon Kite presented a bunch of challenges.
Paper
Right away I noticed the Dragon Kite's paper was not like anything I've seen before!
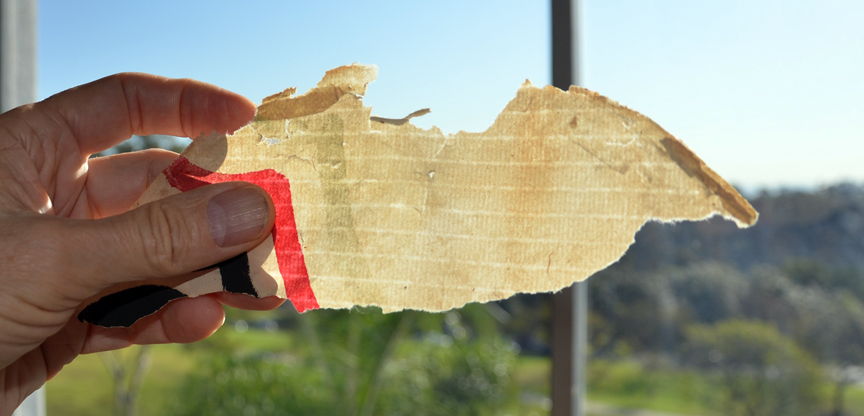
Paper from one of the disk sections
The paper had water-mark like lines in thin rows and wider columns. I eventually found out this kind of marking is typical of hand-made paper. Some Washi paper, made in Japan has similar markings. In researching the kite, Dragon kites appear to be a Chinese tradition, not Japanese, perhaps the kite was made in China but with Japanese paper? I don't know. Please contact me (click on the email address at bottom of this page) if you can shed any light about this paper or the kite. The head and disk were made from this kind of paper.
I found two pictures on the Internet suggesting how the marks in the paper come about.

In the picture to the right, wet mashed rolled pulp made from bark fiber was placed on a mat made of thin slivers bound together by strings. The string heres are spaced a lot wider than in the device used to make the kite's paper.
If one or both of these pictures are yours, please contact me for proper credit.
I contacted a number of websites in search of identical paper, but came up empty handed. However, at a local Blick Art Materials I found a bunch of hand-made Washi papers and the closest I could find in color, look and feel was a paper called Kitakata, imported from Japan.
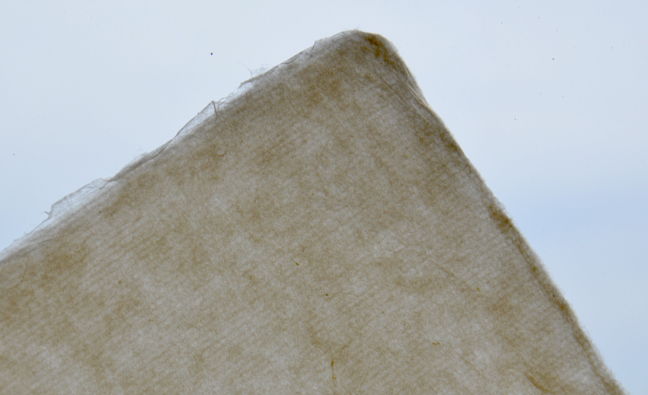
Kitakata close-up
Although the Kitakata has the markings of the thin rows and faint column marks, the paper when viewed from a distance did not have the very distinctive look of the Dragon Kite Paper.
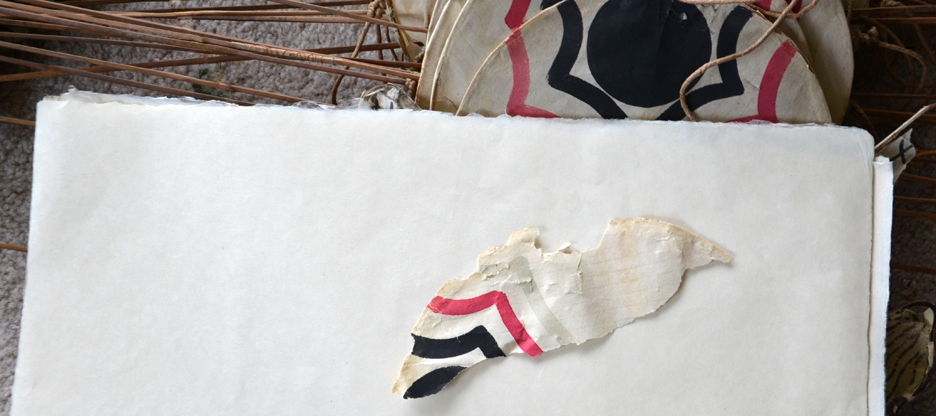
Kitakata Washi paper and kite paper
After investigating this paper I decided it was good enough for the kite, and purchased some sheets on or about April 8, 2014
The Head - Part 1
Restoration of the Dragon Kite's head section occurred in two parts. The first part involved learning about bamboo and attempting to remake the horns. No need to document the travails here. Bottom line is that the bending of the bamboo required for the horns was way past my skill at the time and after several failed efforts I put the head aside and decided to focus on the disks. The first period of head work was from around April 21 through April 24, 2014.
The Disks
About the time I started to work on head for the first time, I also spend time coming up with a design for the disks. I decided that I would not attempt to paint the new disk images for a variety of reasons, mainly as I had no idea what kind of paint was used, and secondly I already owned a good printer, an Epson 7600, with archival inks capable of accepting the sheets of Kitakata paper. It didn't take me long to come up with a design, doing the scans of an original disk and coming up with the artwork on April 20, 2014, although not finalized until April 28. The disks measured on average about 9 1/2 inches across and I design the artwork to be about 10 inches across so when folded around the disk's framework, the artwork would be visible on the top rim as was the case in the original kite.
Of the 39 disk sections, 13 needed structural repair include replacing 11 bamboo circles and 8 sections of horizontal spars. I decided that I would first work on printing and installing new disk paper on the 26 sections which did not need structural repairs, starting from the front of the kite and working my way back.
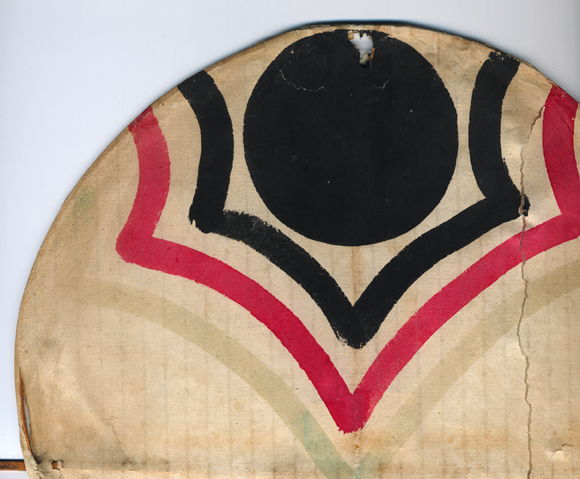
A partial scan of a disk
The disk's artwork consisted of a black circle at the top and three pointed perimeters going around the circle in black, a slightly pinky red, and a faint tan. A couple disks, including the one here, suggested that the outer ring may have been green at one time, but none of the old kite photos show green, so I decided to stick with a light beige.

New Dragon Kite Disk artwork
I didn't make the expanding rings of color exactly parallel in attempt to capture some of the hand painted feel. The thin horizontal and vertical lines shown here were for alignment with the bamboo structure.
Printing was a hassle. I quickly learned that I needed to trim off the elevated frayed edges of the paper before printing, as they picked up ink as the printer head repositioned itself as the print head went back and forth, causing bad smears to appear later. Even then, after three or four sheets were printed, the print heads would get gummed up leaving extra ink in spots. Thus I needed to do very frequent head cleaning. I eventually bought out all of the Kitakata paper stock at Blick and was able obtain enough for 24 disk sections.
The black ink was not as black as the super black paint of the hand painted disks, but the images still looked good.
I used white Elmer's glue for gluing the paper to the bamboo frames. I started the first of the 24 sections on April 29, 2014 and completed the last of the 24 on May 3. The gluing process involved placing a printed sheet face down and drawing disk structure alignment circle on the back side along with marking the horizontal spar alignment marks and vertical center marks (I was able to faintly see the printed image through the paper). Here are the stages:
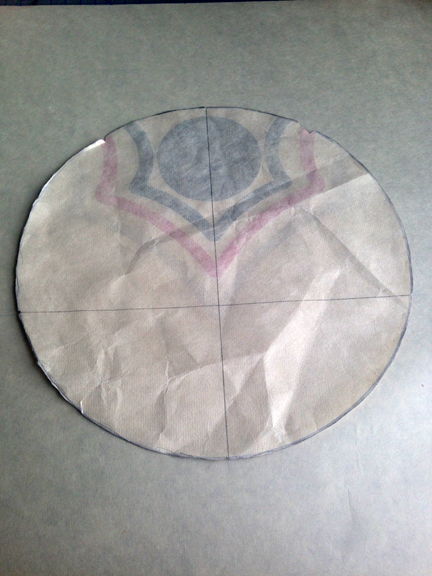
Using an extra trimmed disk image with tiny notches for alignment with the print on the other side of the paper, I was about to draw a circle with pencil around the edge and mark the vertical and horizontal alignment points.
The paper is wrinkled because first I crumpled and tossed it due to a print imperfection then realized I could use it for drawing disk structure guide circles on the back side of the prints.
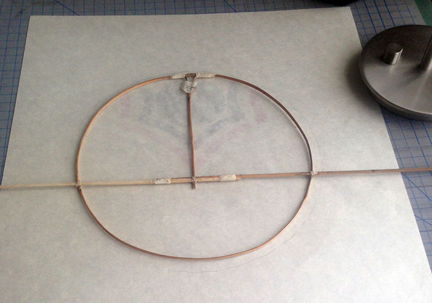
The disk structure placed on back of the sheet.
Coming up with the location of the disk structure on the back of the print was a balance of matching the horizontal spar to the horizontal alignment points, centering the top just above the black circle, and keeping the bamboo circle reasonably equidistant from the edges of the drawn circle. Every spar circle was slightly different and needed careful examination upon placement. I then marked where this particular disk structure's horizontal spar's would be placed after glue was to be applied and mentally made note of other alignment peculiarities.
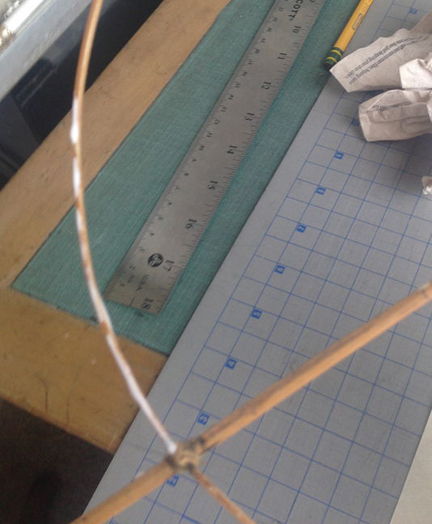
Applying glue to the front of the disk structure (I used a finger). The horizontal bar is in the back (the threads bonding the circle to the cross bar make the bar appear to cross in the front in this photo).
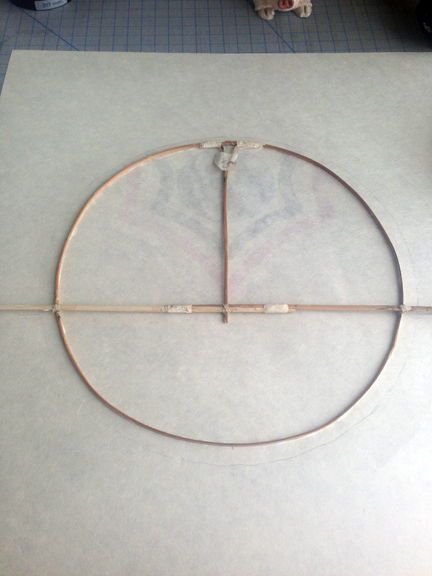
Glued side was pressed face down against the paper
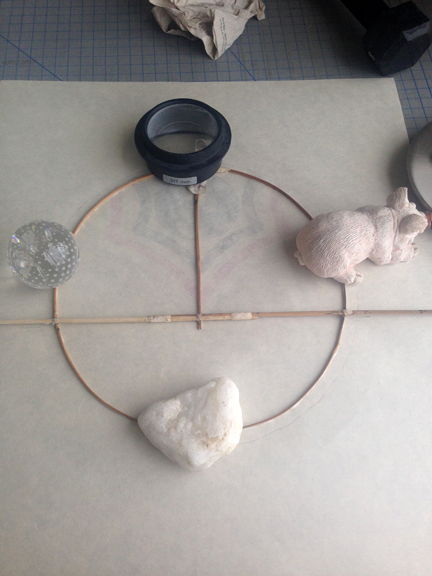
Eclectic mix of weights to hold down the disk
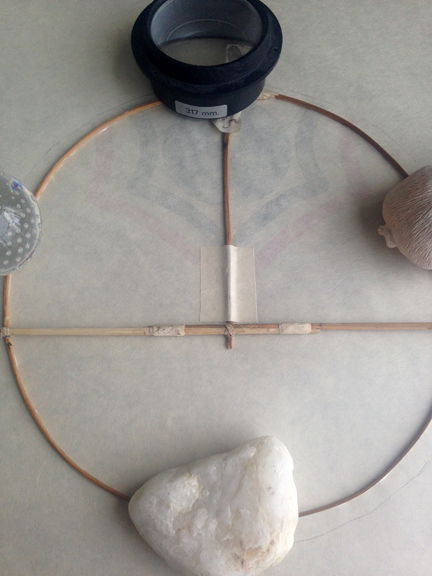
Reinforcement paper applied to the base of the vertical spar.
I used the same Washi paper. No glue was applied between the vertical spar and the paper.
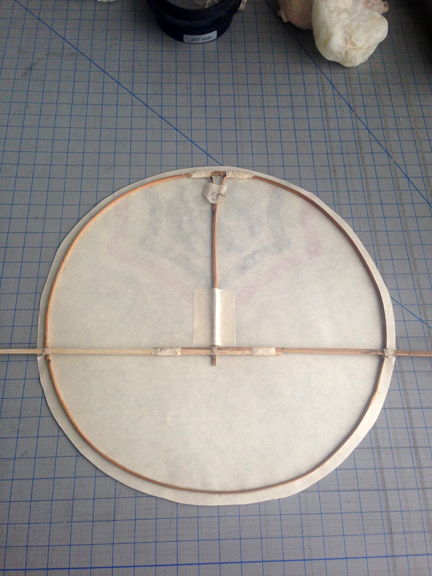
After about 1/2 hour I trimmed the edge of the circle with an X-Acto blade
While waiting for the paper to dry I was probably printing more disk images
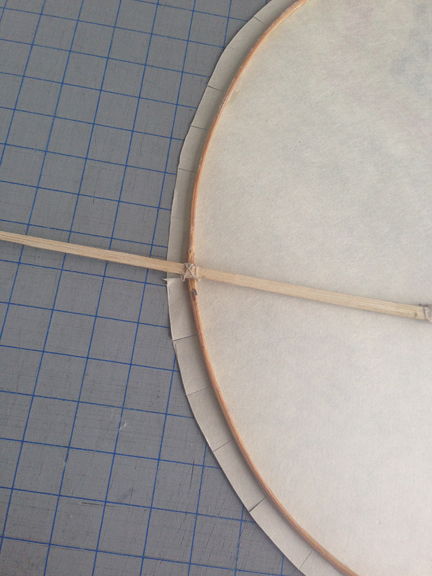
Before folding the paper over the edge of the disk, I cut slits to make the folding easier
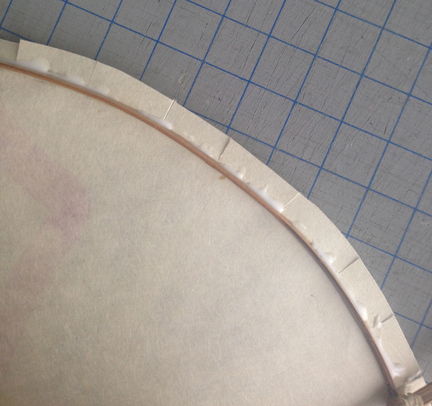
Glue applied along the outer edge of the bamboo circle spar
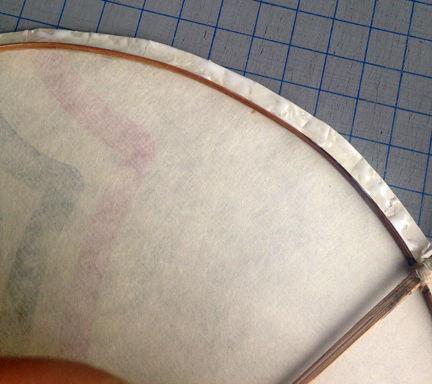
Glue applied to the edge of the paper
I worked one quadrant at a time
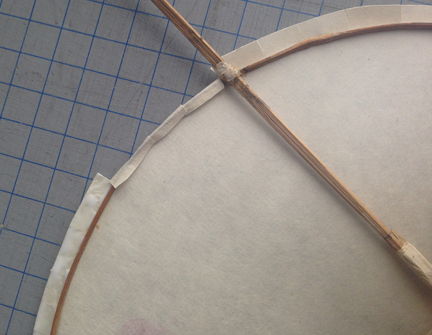
During the first folding pass I did not pressed tightly
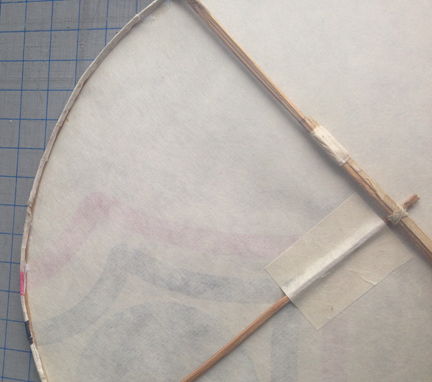
After a quadrant was lightly folded, I ran my fingers along the ridge to squeeze out excess glue.
I trimmed the two tiny sections of paper which could not be folded at the locations of the cross bar
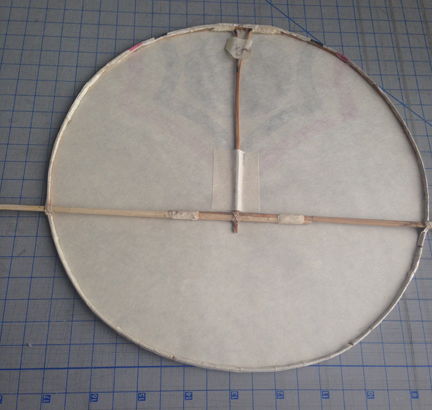
All done!
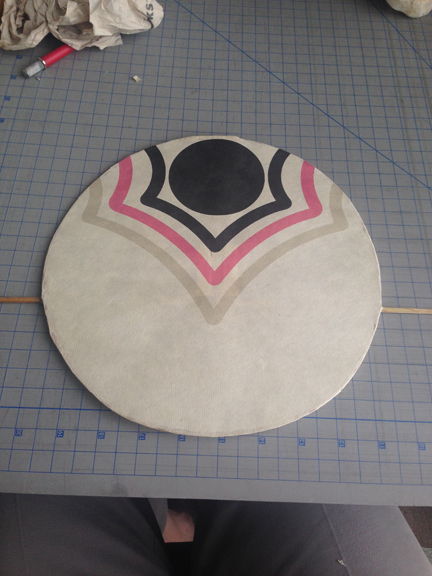
View from the front
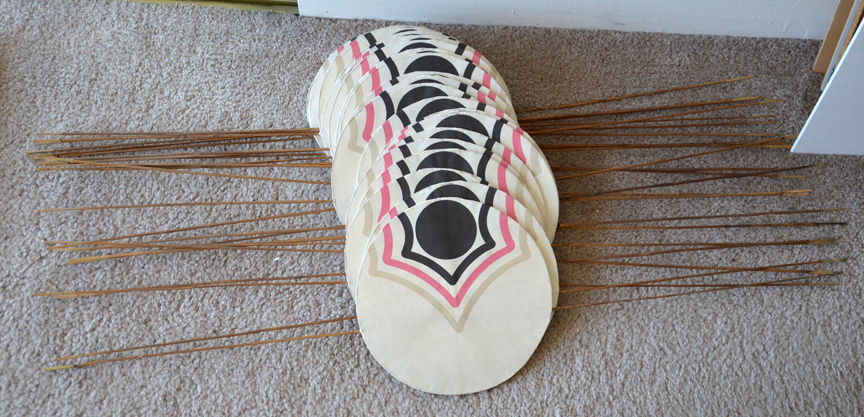
24 Disk sections repaired as of May 3, 2014
After I completed 24 disk sections I focused on the structural repairs of the 13 damaged disk structures out of the 15 remaining disk sections to be papered. In the meantime I had ordered a new supply of paper.
The disk structural repairs took a couple weeks as I had a huge learning curve about how to make bamboo spars and bend them. I did some initial bamboo exploration when I first tried to repair the head's structure before putting the head work aside in favor of concentrating on the disks. I started the disk structure repair work on May 4 and completed the repairs on May 22 with an embedded break for an east coast family visit. The paper work on the remaining 15 disks began on May 21 and was completed on May 24.
At first I looked for where I could buy thin bamboo spars, but came up empty handed. Modern kites are made from modern materials like Fiberglass. I did find some thin bamboo sticks from fence products store but none appeared strong enough - I didn't want thin hollow reeds, I wanted solid spars made from split bamboo. Eventually I decided I had to make them myself. I found a supplier of bamboo poles and set about learning about how to split the bamboo, forming the spars and then bending them.
The method I used involved cutting a dried bamboo pole to length and then with a sharp knife splitting the pole in half lengthwise, and the spliting the split sections until the desired thickness was reached. I tried and tried again but the best consistency of the thickness of the spars I made were no match for the super straight consistent spars of the kite!
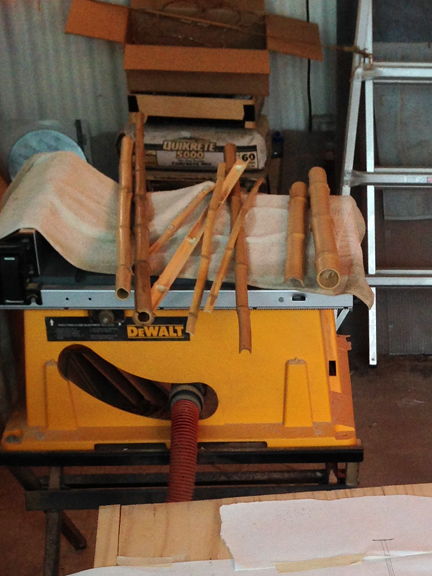
Bamboo poles

A first split of a bamboo pole
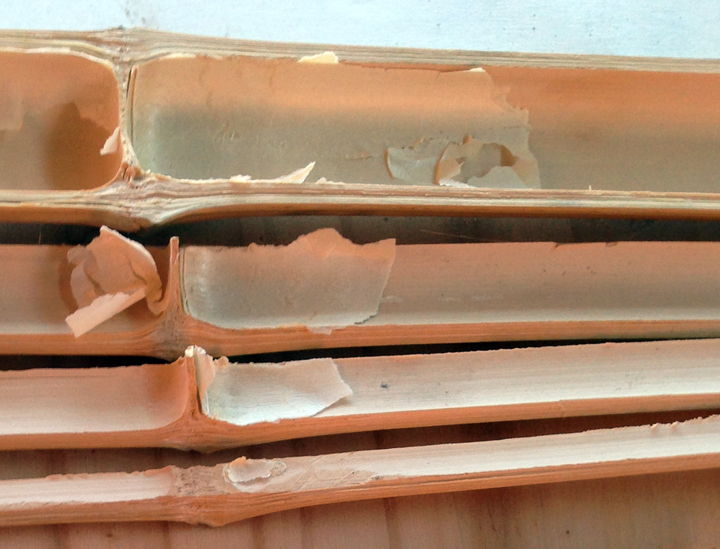
Several splits of another bamboo pole
The tissue paper like interior layer was discarded
I don't have pictures of the next phase of spar preparation. What I ended up doing was after I did one or more lengthwise splits using a knife or sharp chisel, I then picked a good looking split section and manually trimmed it with multiple chisel and hammer hits at short intervals down the course of the split section, sometimes only at the joints or sometimes every couple inches or so. When I had something pretty close to the thickness I wanted, I'd switched to a different tool:
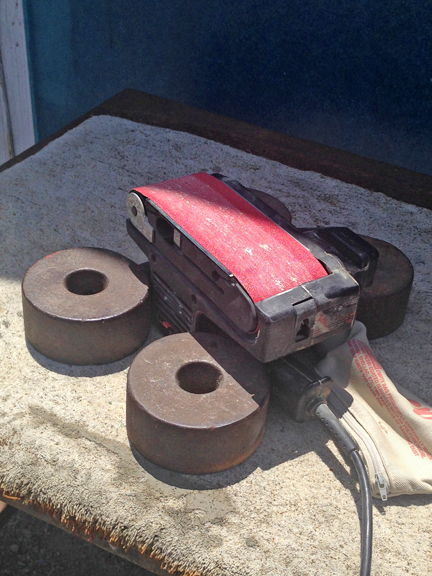
A belt sander place upside down, secured with weights to keep it from moving makes a great power sanding surface!
I used the belt sander to sand down a spar until it had the approximate width and thickness as the kite's other spars. I learned that the bamboo's node point protrusions should be left alone as much as possible to maintain the spar's strength.
For the long horizontal spars, I'd taper the joining ends of the two shorter sections so when overlapped, they could be joined together nicely:

Two 22" spars joined together to form a 40" spar
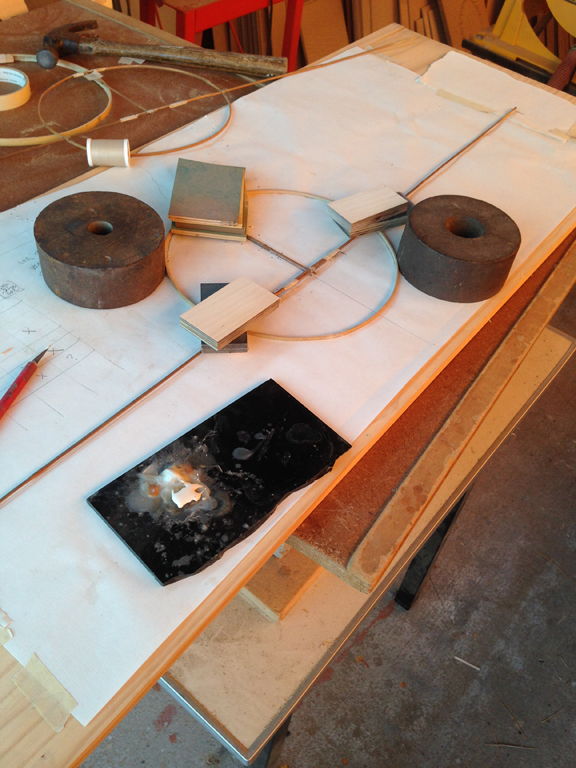
Layout of disk section work area
The circular spars were far more complex and several attempts failed before I created my first satisfactory circle. A lot of trial and error was required to work out a method:
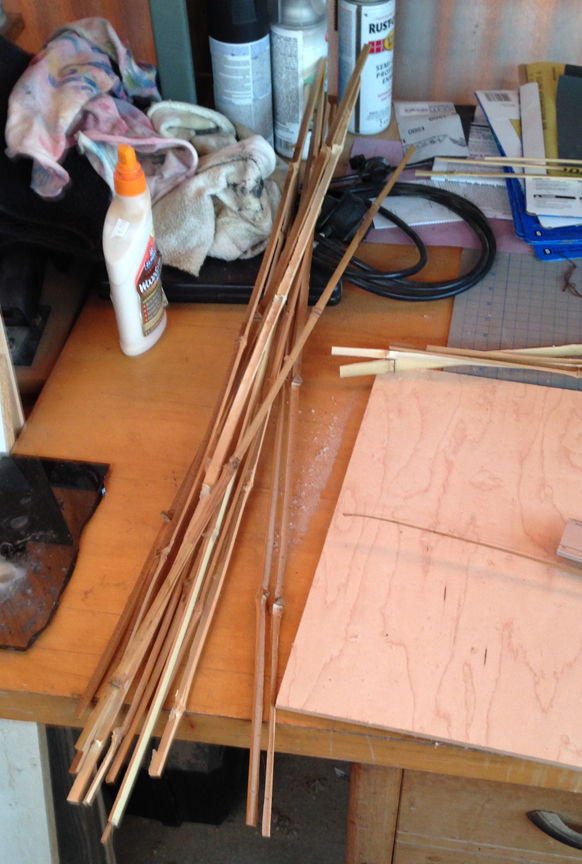
Bunch of spars destined to become circles - splitting done but not belt sanded
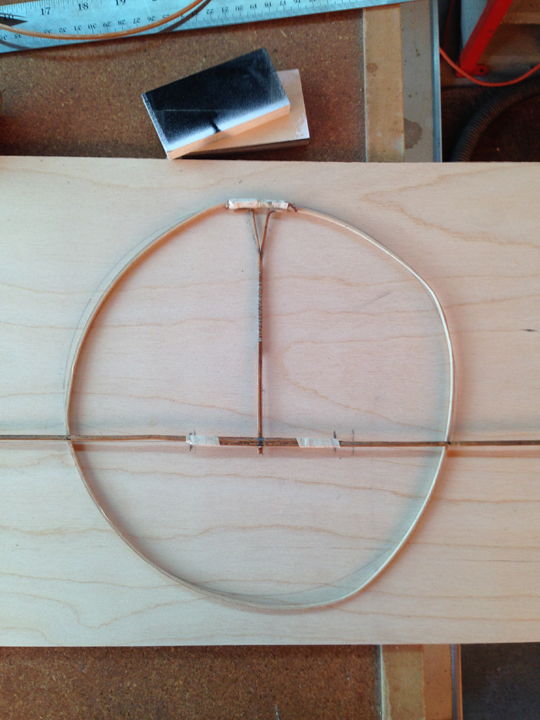
A horrific early attempt, rejected.
The circle failed due to wide inconsistence in the thickness in the spar, plus the node point protrusions in the spar had been sanded down weakening the integrity of the spar
After I sanding a spar to a satisfactory thickness and width, I then soaked it for several hours so it would be easier to bend.
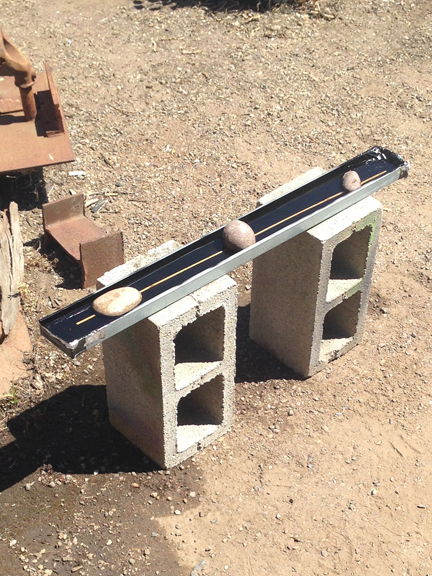
Spar soaking station
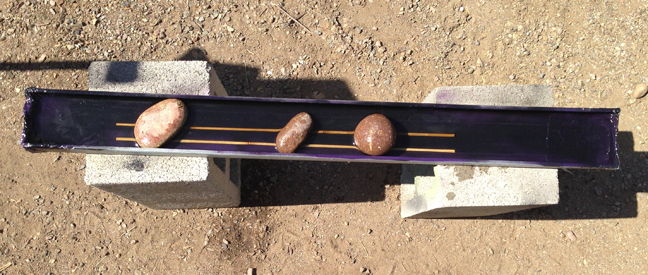
Some videos I saw showed a kite master taking a thin spar and quickly bending it into a circle. No such luck for me. I used a rig of my own design with successively sharper bends, to prep a spar for full circle formation inside a "nail circle".
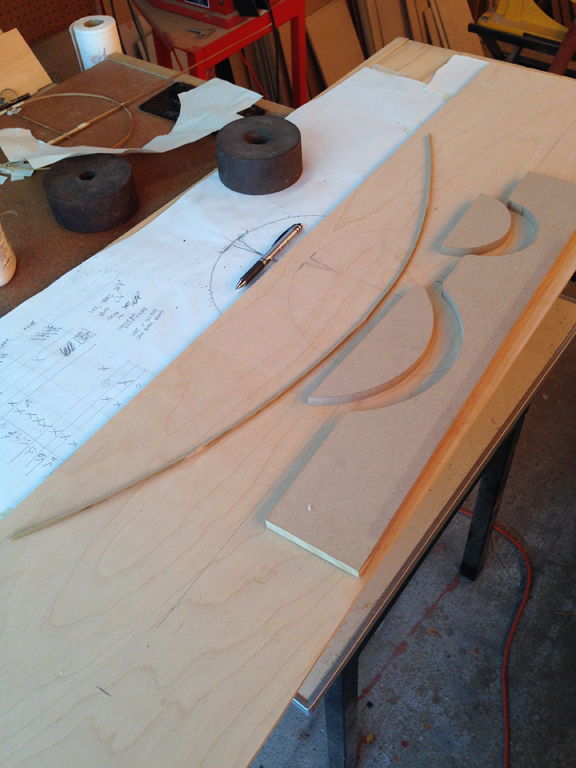
I made a "bending" rig by cutting out curved sections from a board with different curve diameters.
The spar was then placed in successively smaller bending locations and squeezed
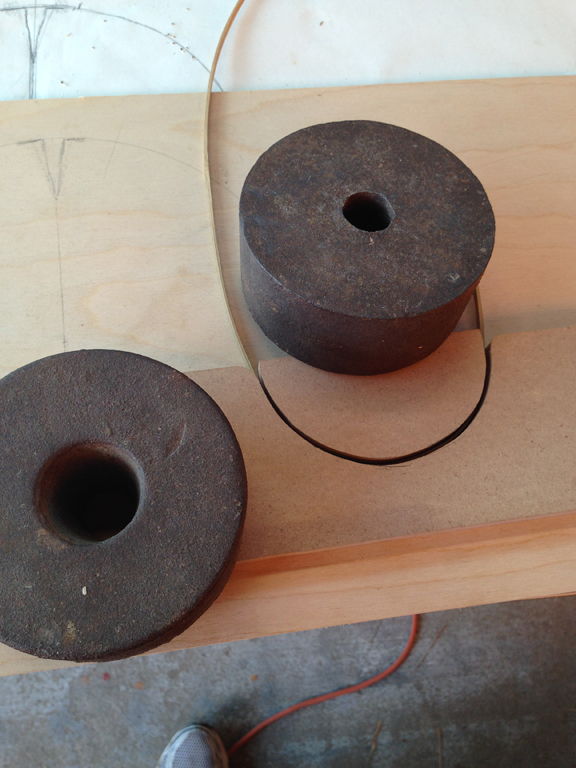
A spar placed in a sharper bending spot, held in place with a weight
The weight was not necessary. I would insert and squeeze one end of the spar within the bending spot, release and move the spar forward a few inches and squeeze again, repeating until the full length underwent bending.

The bending rig next to a straight spar
I eventually created a fifth even sharper bending spot
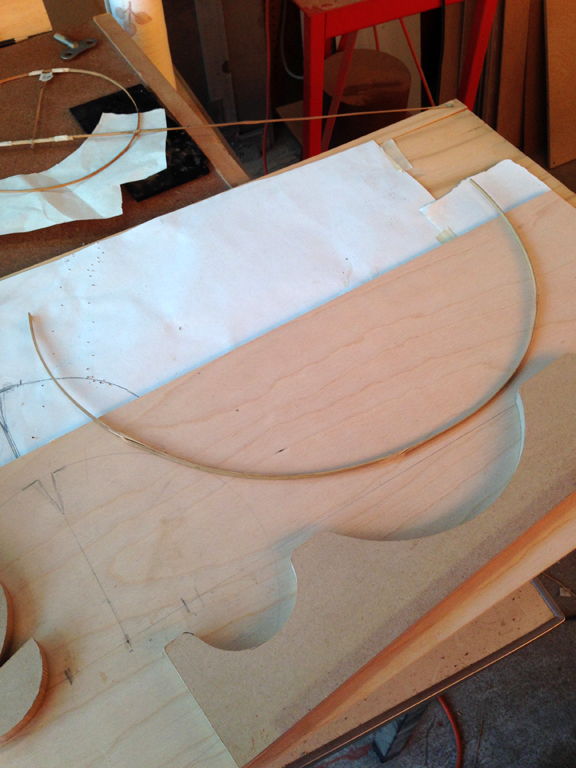
A spar prepped for the nail circle.
Although the spar would spring back after bending, by the time I had bent it using the sequence of tighter and tighter bends, the spar remained bent enough for the next step: the "Nail Circle".
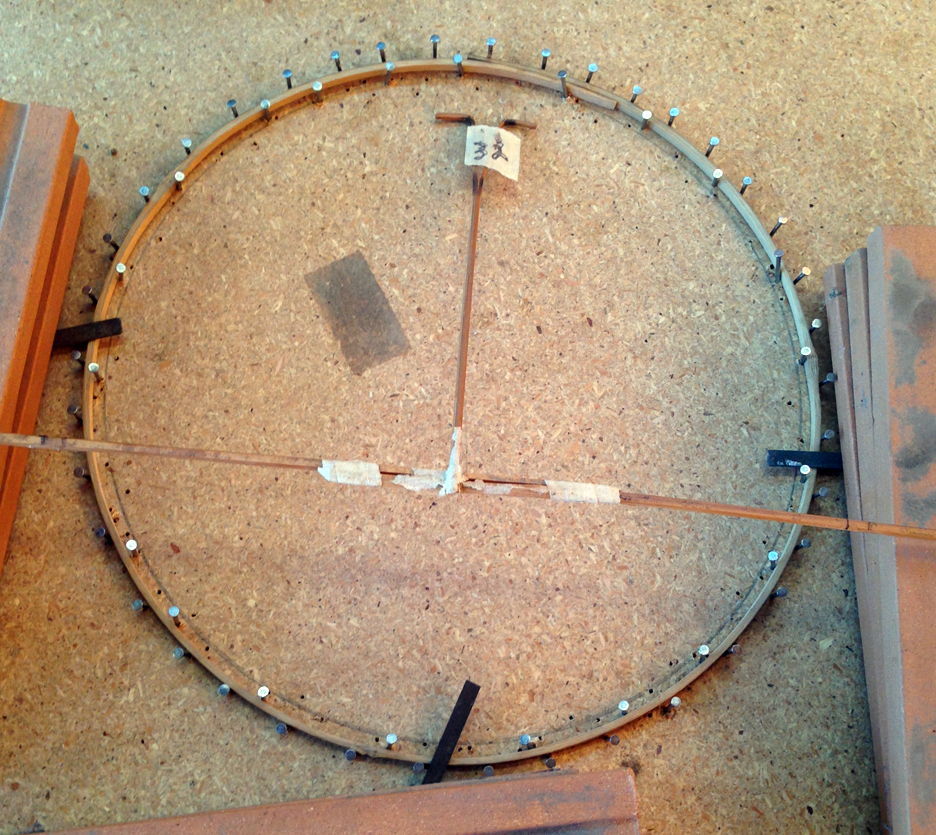
Here a prepped spar has been threaded within the nail circle and held flat with weights. Note the overlap near the top of the circular spar with tapered ends. The horizontal / vertical spar structure was placed just to document this as #32
Attachment of the horizontal / vertical spar structure took place after the the circular spar's ends were tied together and then removed from the nail circle.
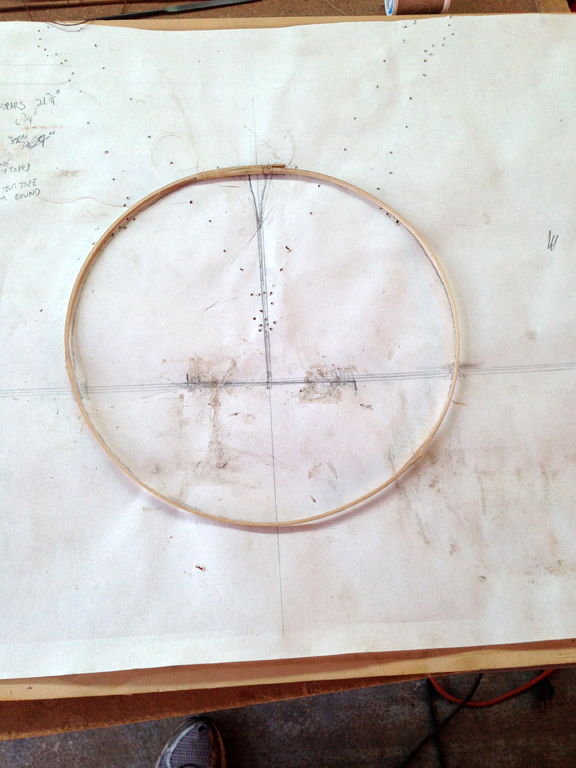
Before the spar was removed from the nail circle, I had tied the ends together
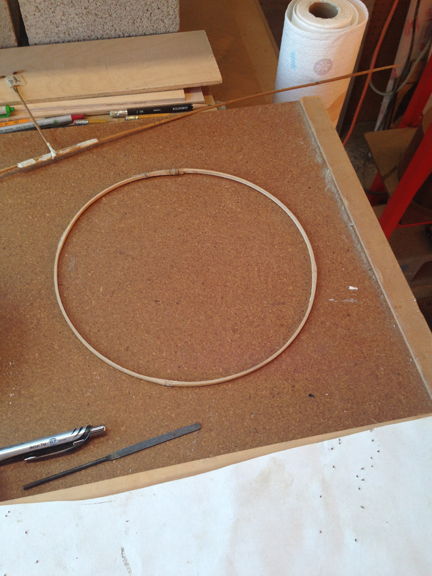
One of my better circles
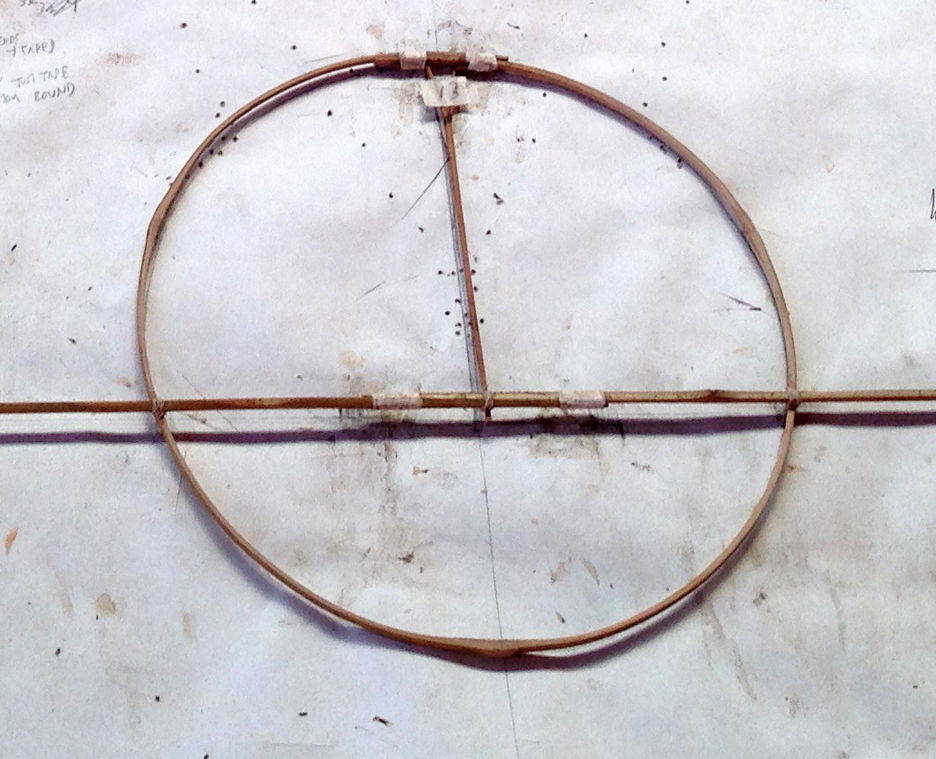
The rest of the structure was attached to the top of the circle with a strip of glued Washi paper and along the sides with thread and some glue
None of the vertical spars were replaced. One was damaged but I had too much trouble creating the "Y" at the top for a new one, so I ended up gluing and wrapping the broken sections.
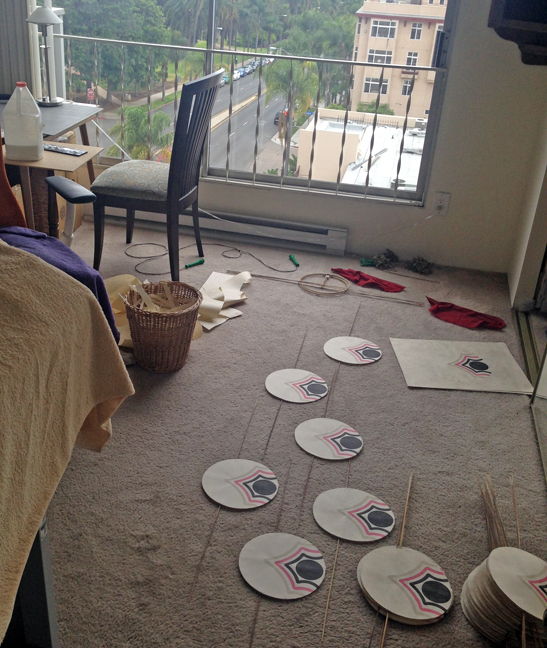
Disk glue-a-thon for the repaired structures with just a few to go
I began work on the tassels on May 24, 2014.
The Tassels
The original tassels were from made from a much thinner paper with the same kind of hand made markings as the disk paper. The tassels were very fragile and continued to shed before I removed them during the disassembly stage. On May 9, 2014, my sister Anne visited and upon looking at the tassels gave me some insight into how they were made, that is the tassel paper was folded prior to being glued to the spar. On May 24, 2014 I dissected three of the four saved tassels and gained further insight about their construction.
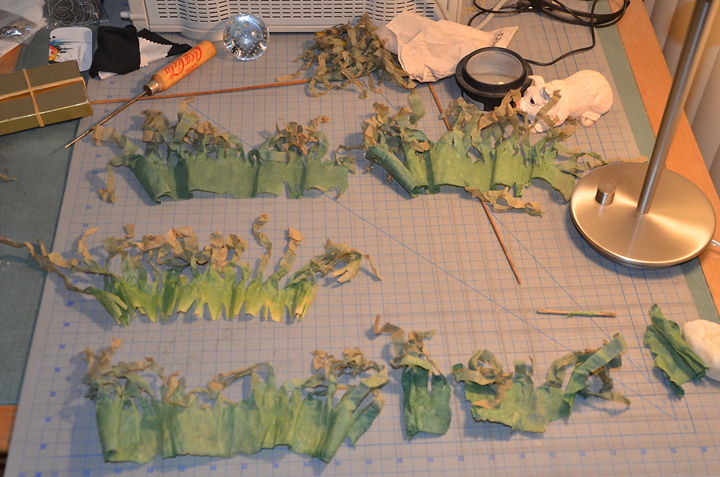
Three unravelled tassels
Two of the three tassels were "fat" prior to disassembly and I used these for analysis. The paper for a tassel fully unravelled, connected together and measured, appeared to be about 20 inches in length, about 6 1/2" wide, with the individual tassel prongs cuts about 5" long, with about 48 prongs per tassel bunch. Careful examination of the tassels prior to dissecting them showed they were cut as an "8 ply". The creases in the unravelled paper confirmed this.
After some experimentation I worked out a method to create some nice tassels. I went to my supplier for puzzle box tissue, The Container Store, and found some dark green sheets which looked pretty good, although not handmade paper. The exposed ends of the old tassels were faded to a dirty brownish green, while the newly exposed parts upon unravelling were a much richer green. I did not investigate the color fastness of the new green sheets, I supposed they will fade over time. However I plan to make a storage container for the kite, which should help prevent the green paper from fading.
With 39 disk sections and the Dragon's head, I had to make 40 pairs of tassels or 80 tassels in all! I installed the first acceptable tassel pair on May 25, 2014, nine more pairs on May 26, and the remaining 29 pairs for the disk sections on May 27. I held off installing the Dragon's head pair until after the main parts of the Dragon head section were restored. I used the following method to create the tassels:
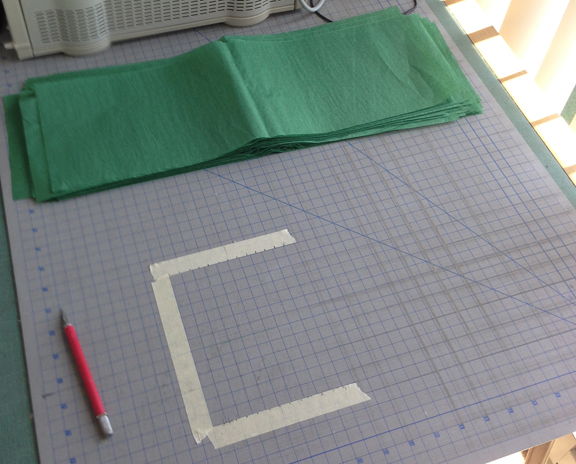
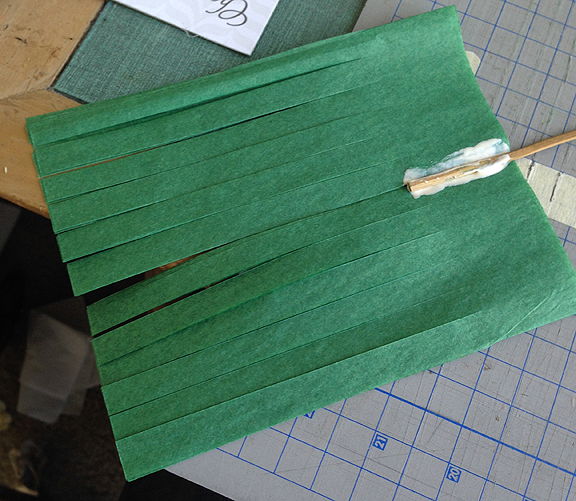
Cut a whole bunch of 20" x 6.5" sheets and set up some cutting guidelines (additional cutting guidelines were added as seen in subsequent pictures)
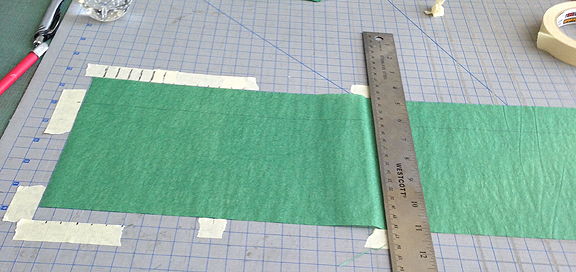
Lay a sheet in place, draw a horizontal line 1.5" from the top and then make the first 5" cut at the center
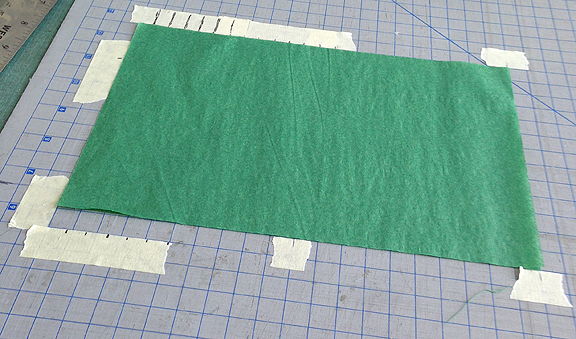
Fold the paper to the left along the first cut
The paper is now 2-ply
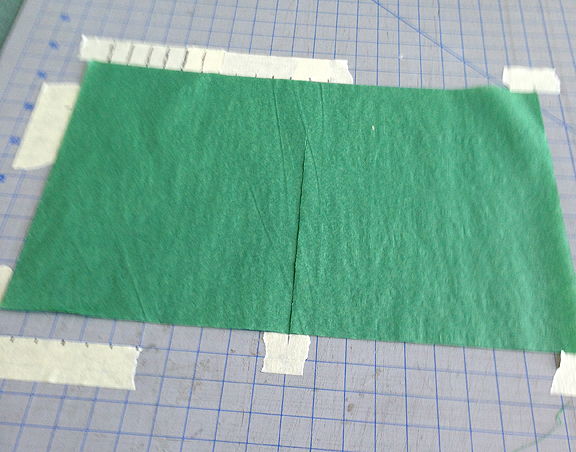
Make a second 5" cut at center of the folded section
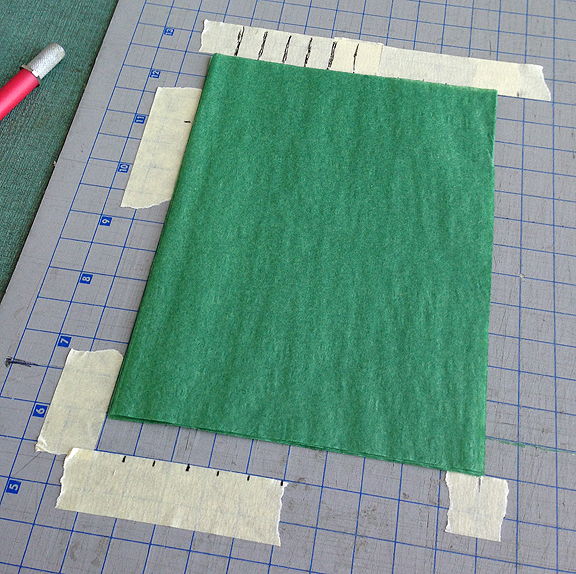
Fold the paper to the left again along the second cut
The paper is now 4-ply

Make a third 5" cut at center of the folded section
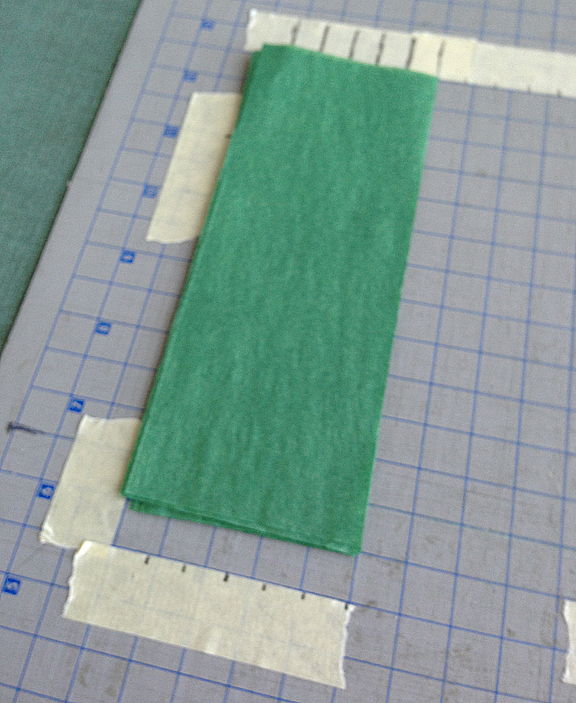
Fold the paper to the left again along the third cut
The paper is now 8-ply. The black marks on the tape show where five cuts will be made in this configuration
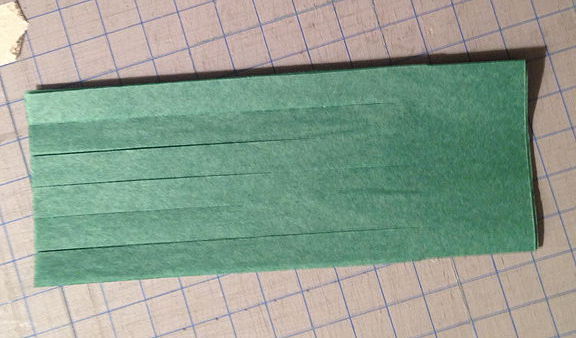
The folded 8-ply paper after 5 cuts were made (I don't have a picture of the paper in place)
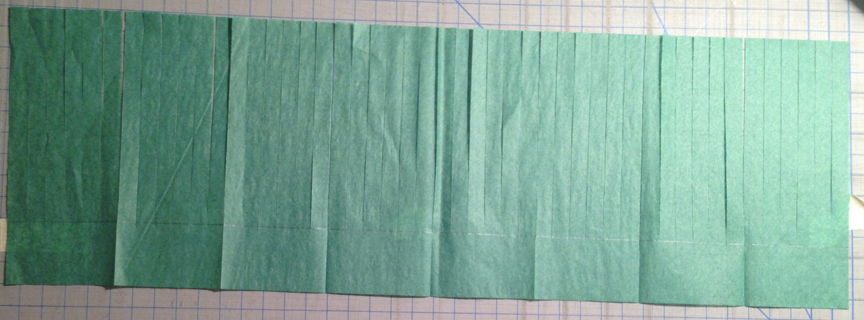
Unfolded paper showing the 48 "tassel prongs" along the 20 inches of paper, cut with just 8 cuts
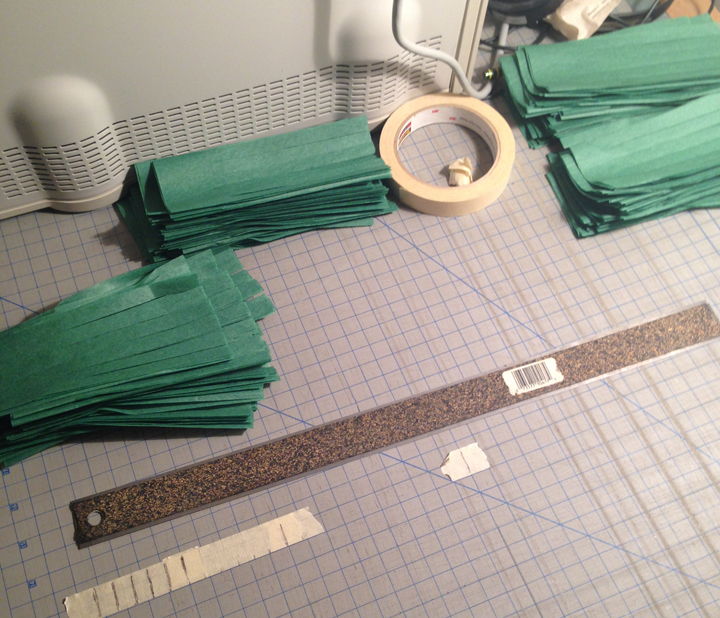
Bunch of folded tassels ready for installation
Unfold the tassel once and apply wood glue to the end where there are no cuts and place the spar 1 1/2" into the tassel assembly
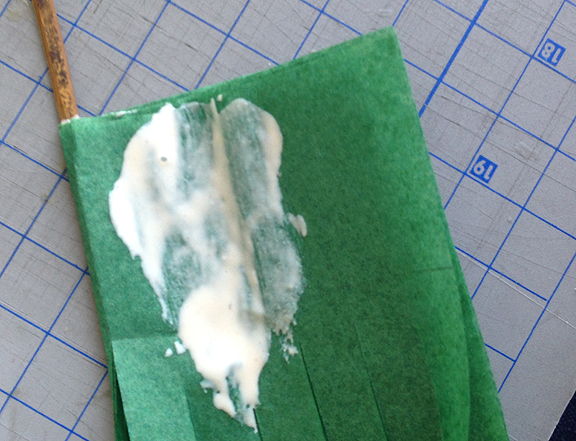
Re-fold the tassel assembly and then mush some glue for rolling the tassel
The glue in this case instance was a little sloppy, but OK
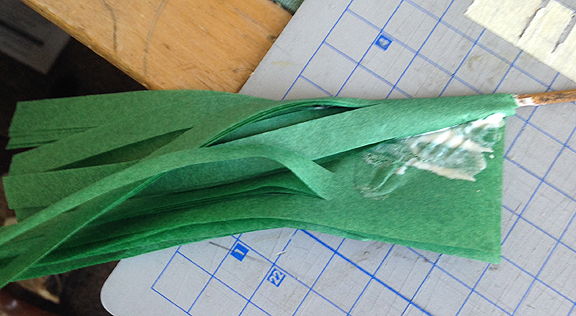
To get the cone shape of the original tassels, I rolled the tassel at an angle being careful not to catch any loose tassel prongs in the roll. Additional glue was used as needed.
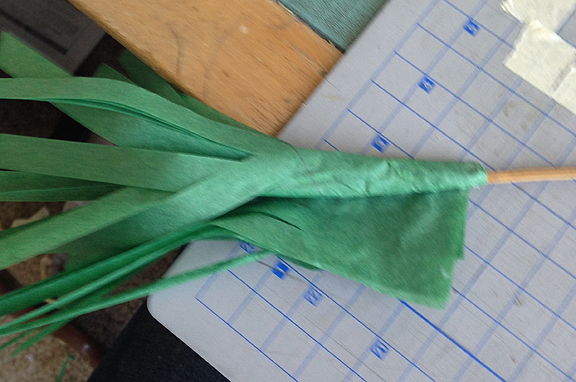
Because there were multiple plies of paper, the tassel had no glue between other pairs of "ply points". I'd locate and unroll those as found, the first "unroll" shown here
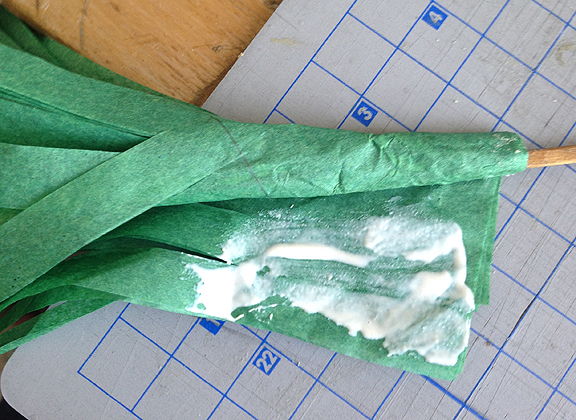
Glue applied as needed.
Rolled afterwards

A completed tassel

The first disk after both tassels were installed
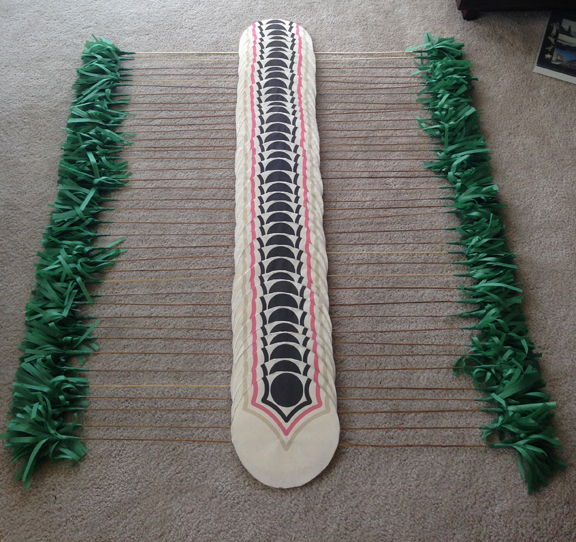
An army of 39 papered and tasseled disk sections!
The Head - Part 2
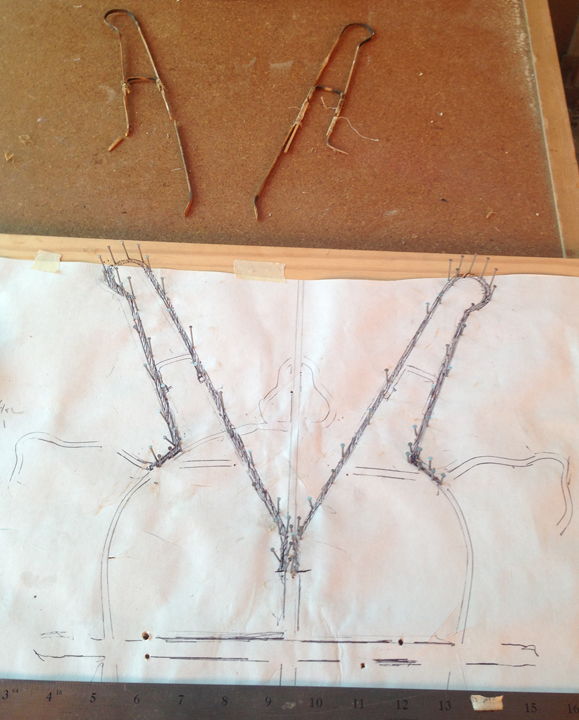
Head's old horns and layout for new horns
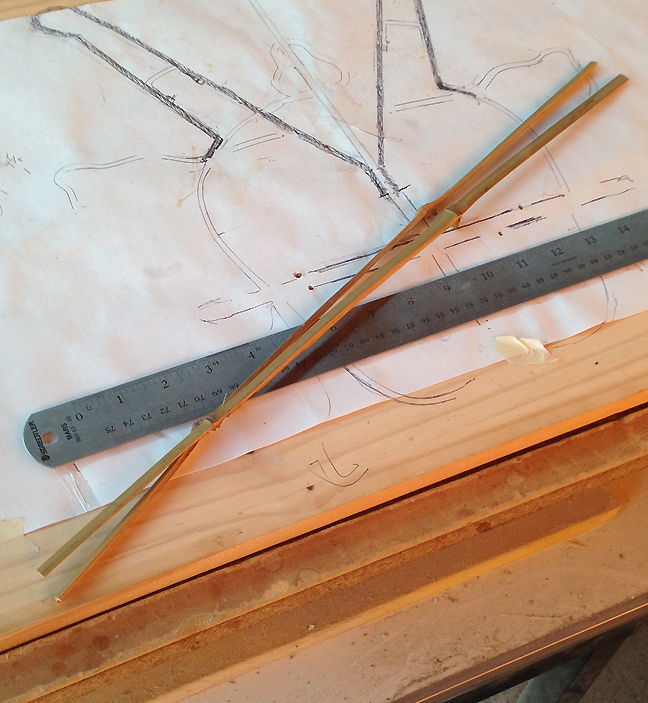
Split bamboo spars for the new horns before sanding with the belt sander
Sanded horn spars soaking
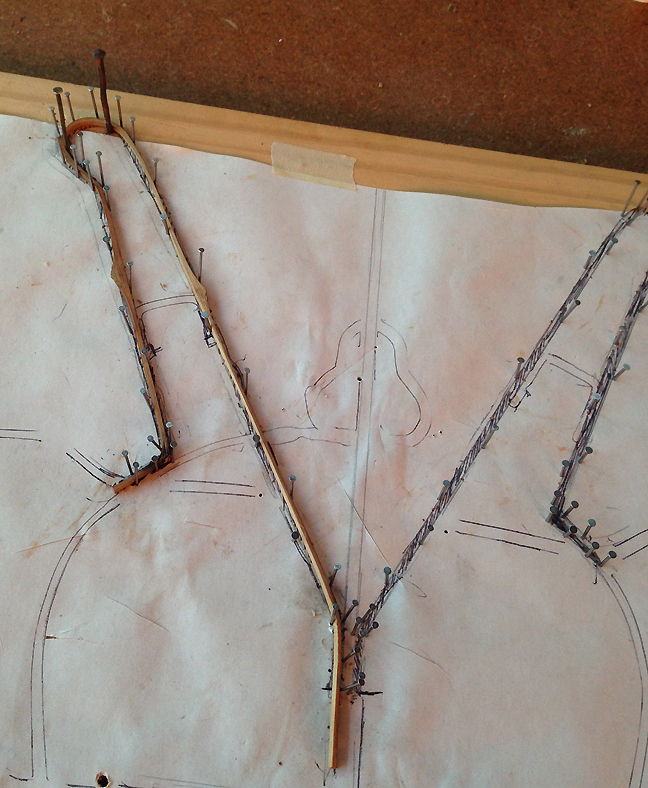
First horn placed
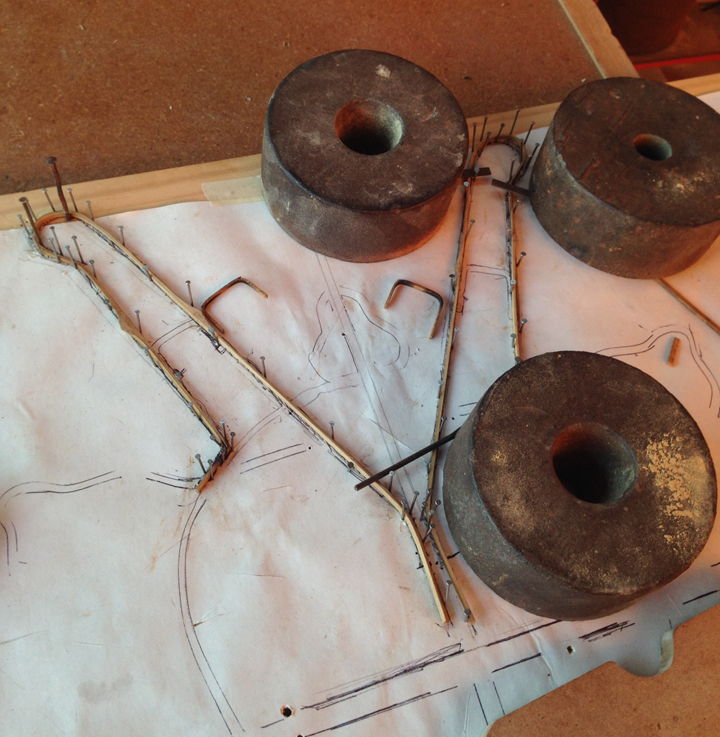
Both horns placed. There were cracks in both horns at the sharp bend points; these were treated with glue
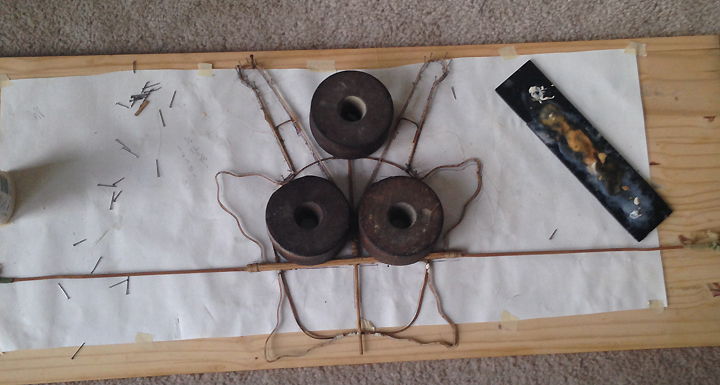
Placing the head frame by the horns
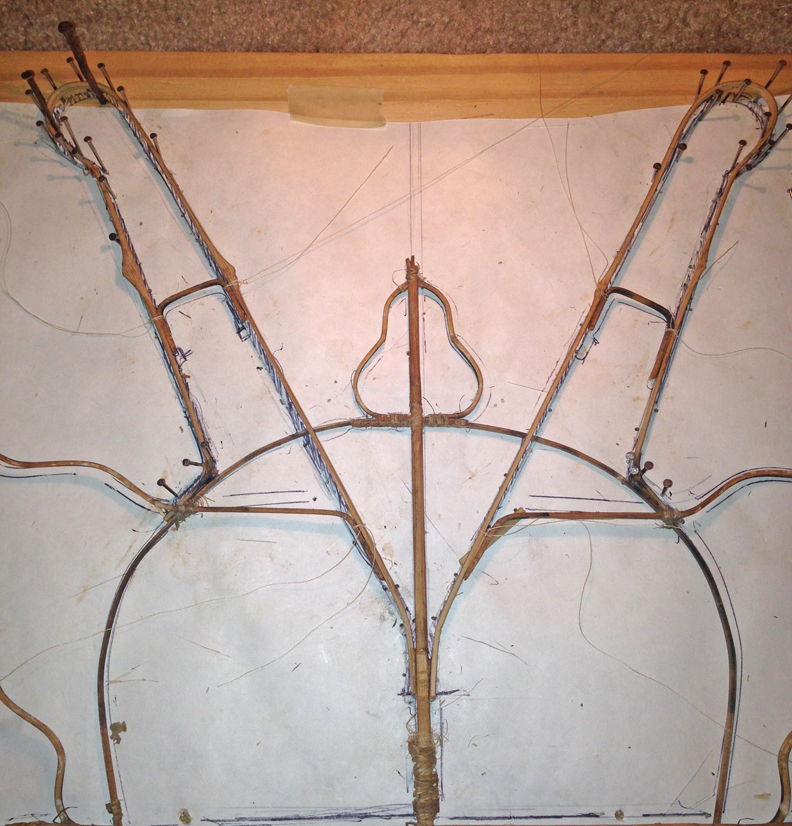
Tying the spars together
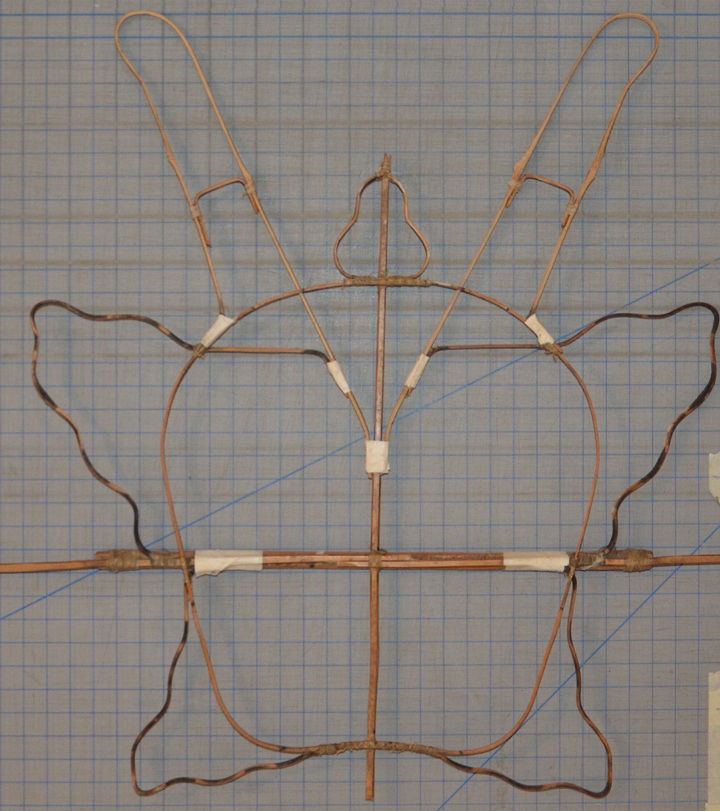
Head frame repaired after some parts wrapped with glued Washi paper
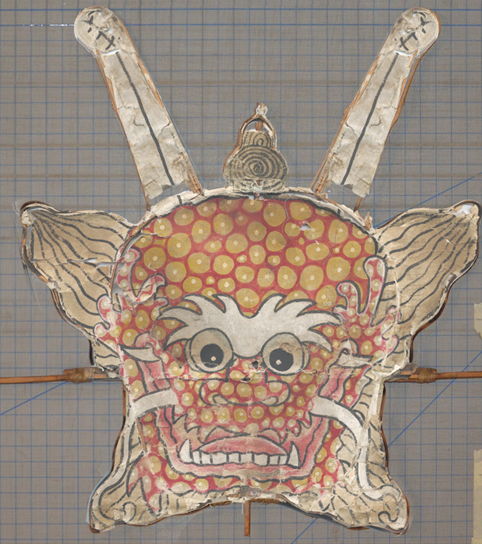
Original Dragon Head scanned artwork aligned and superimposed on the Dragon Head frame in Photoshop
Once I began work on creating a new version of the Dragon's head artwork, I realized that the outer "gray hair" on the lower left side of the image was missing, probably because it originally extended beyond the frame. I decided to take the liberty to digitally narrow the head's image slightly (not including the horns and top spiral) and add some "gray hair" imagery on the left side.
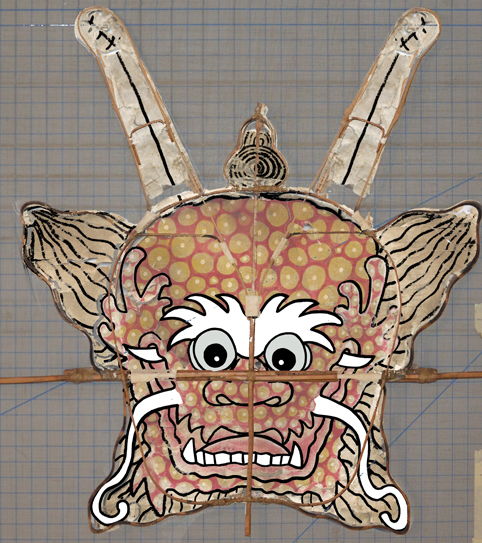
Dragon's head after adjustment. In this Photoshop image, the head structure layer is shown on top of the head for image alignment purposes.
I had already begun some of the new artwork with the eyes, teeth and other white areas and some of the black line work.
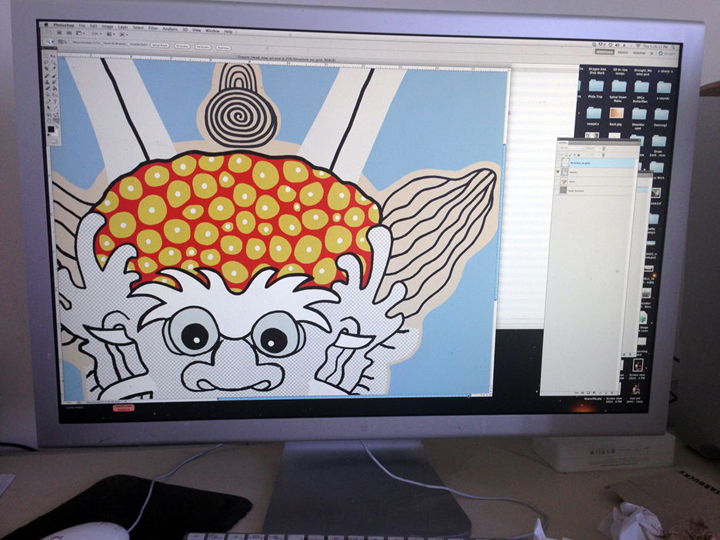
Photoshop work on the Dragon's Head artwork as of May 29, 2014
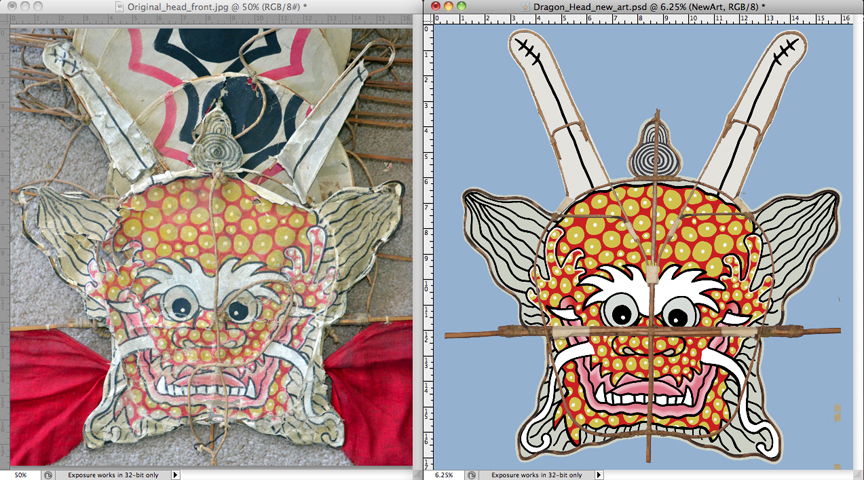
By May 31, 2014 the artwork for the Dragon Kite's head was done. The horns didn't have the sharp bends near the end like the old ones in the original kite. Decided to accept and move on.
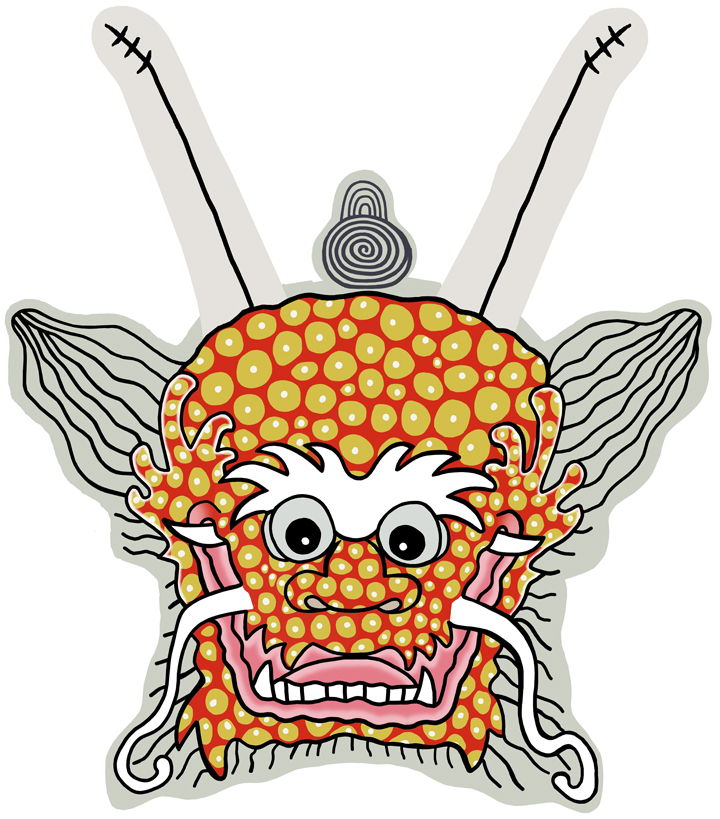
Reduced resolution of image used for printing the Dragon's Head
I do not have any pictures documenting the gluing of the head's printed image to the frame.
The Flames
The next day I wrote this email:
Last night I printed the Dragon's head, and after seeing some problems with the print being cropped at the bottom by an over assertive print driver, made some adjustments and printed it again, then glued it to the frame. Overall the gluing process was quite harrowing as there are many contact points and the glue dries quickly in addition to dealing with the unevenness of the frame. Overall the results look good, although where the glue was more concentrated it made marks through the paper which did not fully go away when dried overnight. There are other issues, but I'm pretty much done with it. Although the colors were bright in Photoshop, the colors on the print look remarkably like the original Dragon's head.
This morning at my shop I repaired the spar for one of the flame sections - I couldn't remove the cloth without tearing it so instead of replacing the spar I made a splint and attached the two original pieces to it with glue and thread. Worked quite well.
Back home I then attached the two tassels to the head structure.
I then attached the flame sections to the head structure using thread, no other way they are attached.
So..... the time has come to put this project aside and focus on the 2014 Puzzle Parley. All of the remaining steps involve stringing the kite. One additional thing: I'm quite concerned about the fragility of the head structure, the frame, the paper, pretty much everything about it. When I get back to the kite I'm going to add some re-enforcement paper on the back side. There was a lot added over the years to the original kite.
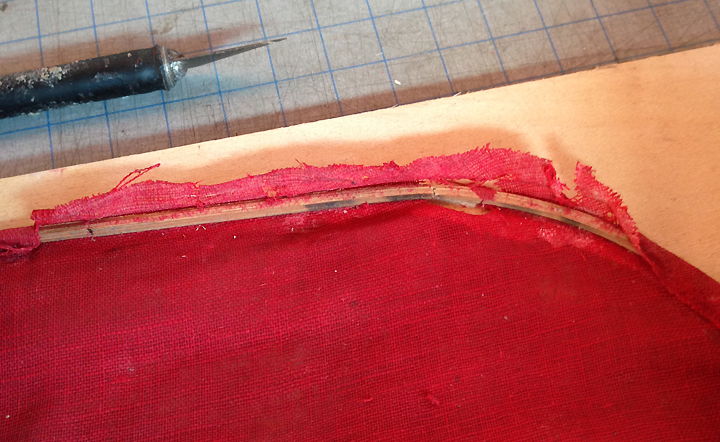
Broken spar exposed, just where it begins to bend
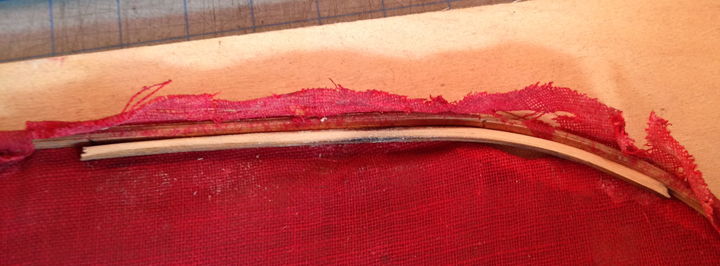
Splint for broken area before bound with thread and glue
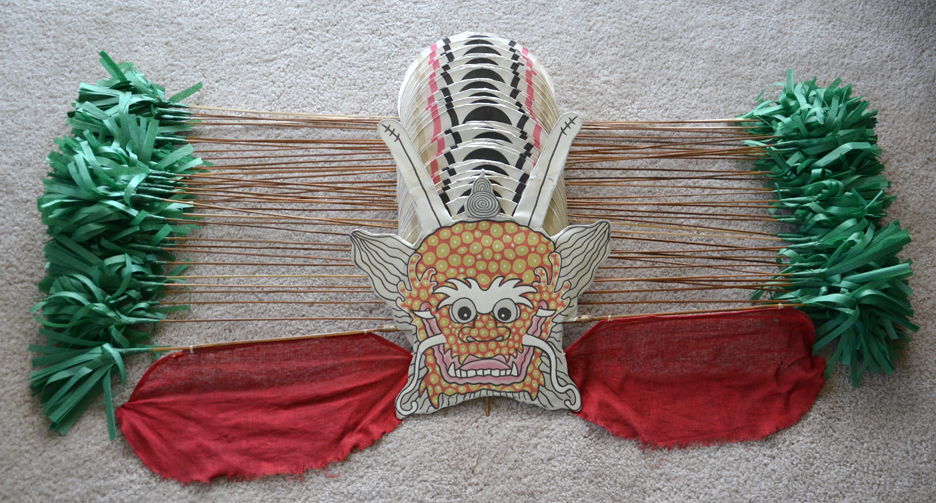
Dragon Kite as of June 1, 2014, all sections repaired! Only the stringing needed to be done.
The String
Three and a half months passed before I finally got to the stringing of the kite!
I started from the rear of the kite and worked my way to the front. Stringing started on September 15, 2014 and concluded on September 17 for the 39 disk sections. I connect the Head section on September 18 and the flying string the next day, the completion date of the kite.
Before I strung the kite, I made a rig for holding the Disk sections together, adapted from a design I saw in the Internet. This was done on Sept 11, 2014.
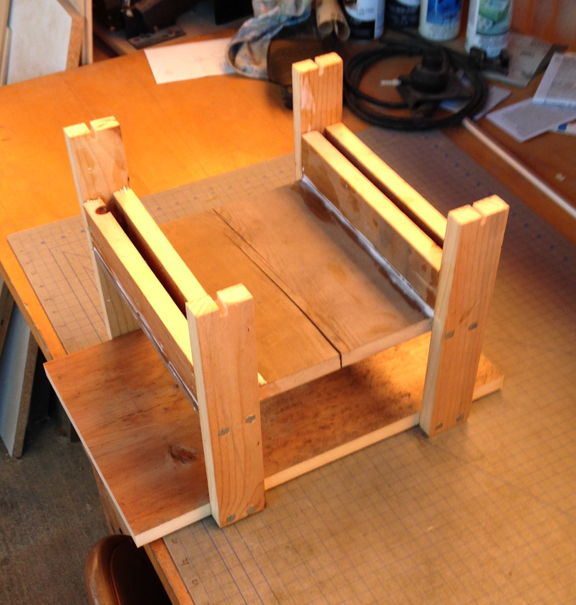
Rig for stringing the disks
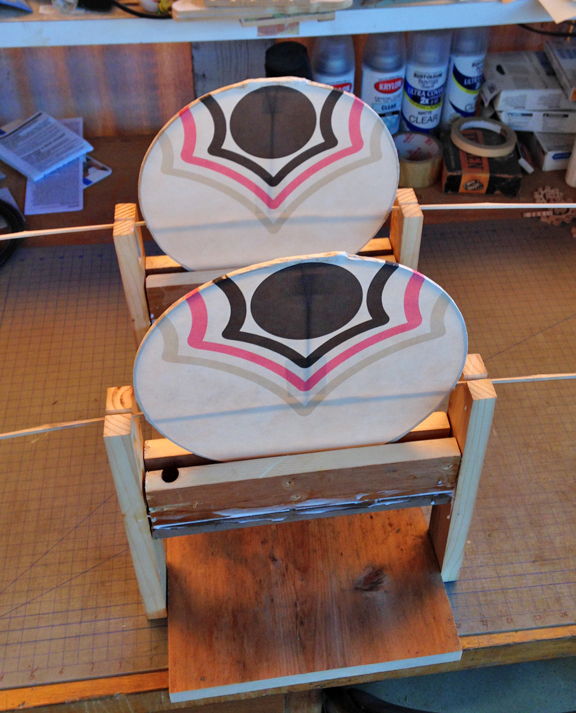
Disks placed in rig for stringing
Not shown is this picture are the small holes punched at the top of the black disks.
After each hole was punch I checked the balance of the assembly and added small wooden weights as needed near the tassels.
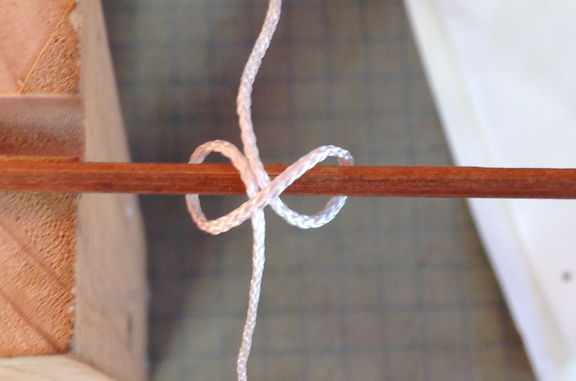
The two strings were run along each side of the disks, connecting the sections with the same knot used in the original kite
The top of the disks were connected with hitch knots
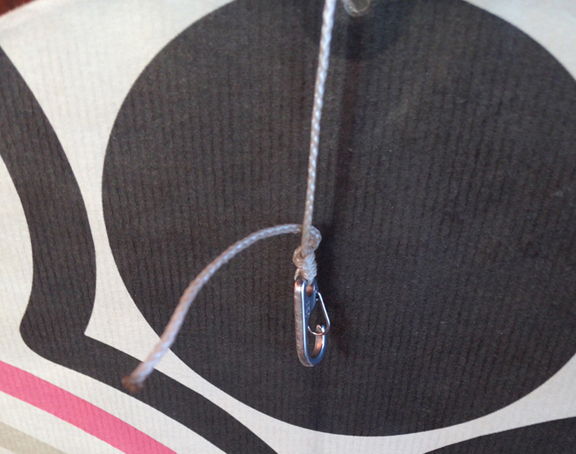
I used a "Midshipman's Hitch Knot" to connect carabiners along the way, dividing the kite into four sections to make major maintenance ,if required, easier
These knots were also used for the heavier flying string
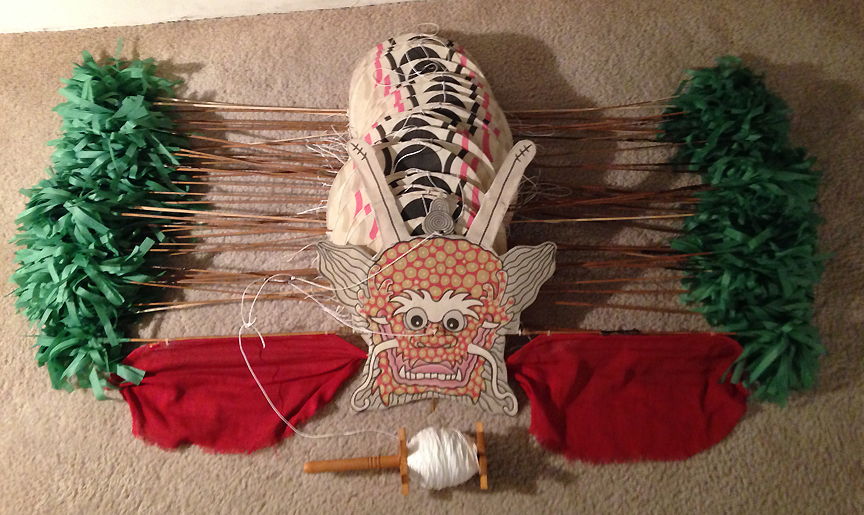
Dragon kite done, September 19, 2014
The 40 sections were connected together with three runs of 80 lb. polyester braided string. The head was connected to the flying string with two runs of 110 lb. polyester braided string . The flying string is 110 lb. polyester braided string.
The Spooler. The original was in bad condition and I found a replacement on eBay.
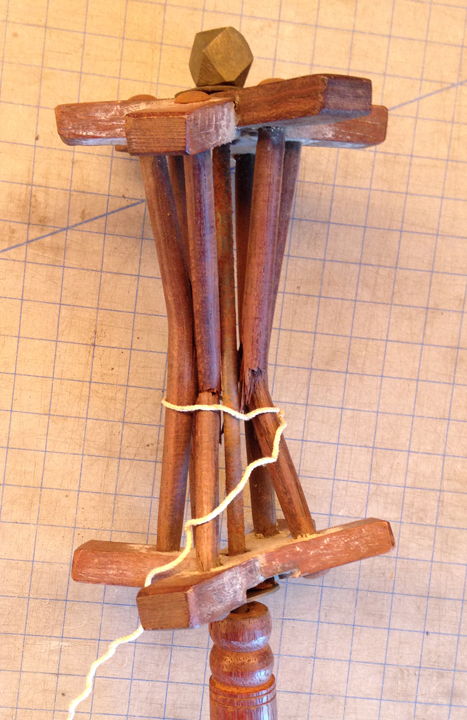
Old string spooler after the string was unwound.

One end of the old spooler
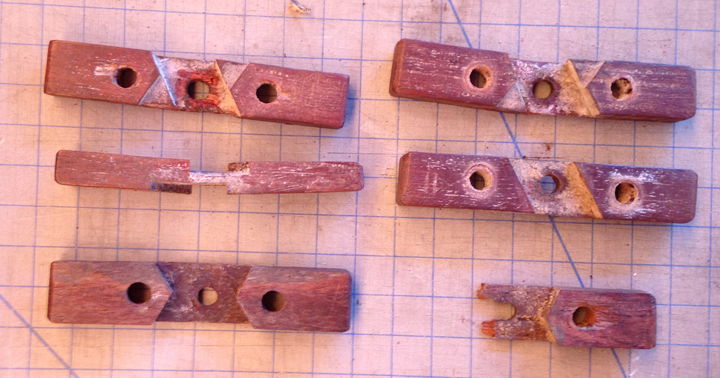
Little three piece puzzles!
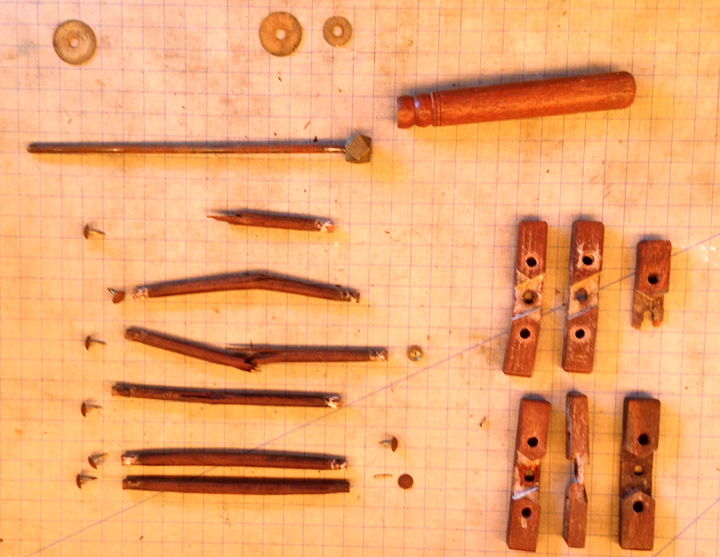
Old spooler pieces
Unsalvageable
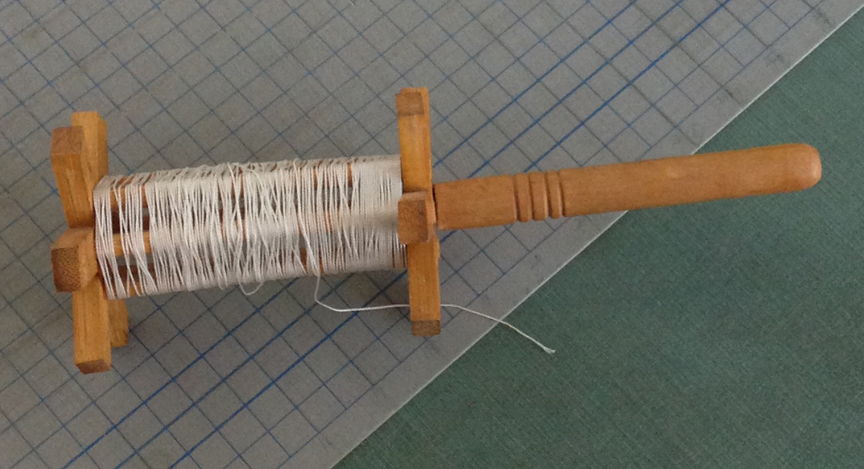
New spooler before the accompanying string was discarded
|